Content from Introduction
Last updated on 2024-12-31 | Edit this page
Estimated time: 10 minutes
Making it FAIR
Once a 3D model is created by deploying digitisation methods, it is good practice to provide access to the 3D model.
It is also useful to follow the FAIR principles, which states that content should remain:
- Findable: allow others to find the 3D model and the information related to it.
- Accessible: the 3D model and its metadata should be accessible via using a protocol for web, such as HTTP/HTTPS.
- Interoperable: consider how other users will bring together content from various data sets, for instance to create a new project. Some frameworks such as IIIF (generally pronounced “triple-eye-eff”) allow for linking to visual media in an interoperable way.
- Reusable: 3D data should be released with a clear and accessible data usage license.
Interactive Linear Stories
Storytelling is a useful way to engage users with heritage assets and their stories. Storytelling is a large domain, here we focus on the stories which are easily enabled by accessible web-tools.
Interactive linear stories allow users to interact with the 3D models by following a sequential narrative. This type of storytelling is popular in museums’ applications, such as kiosks.
Images and 3D models also use a technique called annotations, where more information can be pinned to the asset at a specific position. This technique is heavily used when interacting with a 3D model to direct the attention of users to particular points which are of interest.
Skara Brae, Orkney by Historic Environment Scotland on Sketchfab
Interactive 3D content
Interactivity allows users to access detailed information on 3D models. For instance, it allows decomposing or interacting with parts of an artefact, as in the recessed ceilings from Zhihua temples from the imperial Ming-era craftsmanship. You can find this example here: Disperse Chinese Art Digitisation project.
Scrollytelling
Websites also use the popular scrollytelling technique, which allows a user to follow a narrative by scrolling.
By doing this, they access an interwoven mix of textual and visual media, including images, videos or 3D models, with which they can interact to get additional details.
Exhibit of Jane Austen © Dr Elizabeth Andrews click here to open in a new window.
Content from Web viewers
Last updated on 2024-12-31 | Edit this page
Estimated time: 10 minutes
With the advent of HTML5, web browsers are fully ready to render 3D models without users needing to install any additional software or plugins.
Many platforms for publishing and sharing 3D models have been made available, including some which are popular with cultural heritage content:
Most of these solutions use cloud technologies in which the 3D models are stored on the servers of the organisation providing the software.
Hence, they require the user to upload the 3D model and prepare it for viewing.
Preparing 3D files
Before publishing, there is a need to prepare the files for publications.
This involves ensuring all post-processing and visual enhancement are done, and the model is ready to be uploaded online.
Normally, you will need to:
Reduce the number of polygons to create a lightweight version of the model that is optimised for web publication. This can be done either in the software which generated the 3D model, or using a software such as Blender or Meshlab.
Ensure the textures are saved with the 3D model.
Save using a web-friendly format. Various tools will have different requirements regarding formats. Normally, OBJ or glb/gltf are widely accepted.
Content from Publishing with Exhibit
Last updated on 2024-12-31 | Edit this page
Estimated time: 65 minutes
Specialised tools, such as Exhibit, allow to easily curate a story bringing together multidimensional media, including 3D, images and video. It is IIIF compatible leveraging its interoperability to bring together various conten.
For example, the example below shows the story of the Kinora, which was an early motion picture device developed by the French inventors Auguste and Louis Lumière in 1895.
As you will notice, the story brings together images, videos and 3D models to illustrate the history of these artefacts, their context and mechanics. The media with which this story as developed is available here.
You can also view the story here: https://www.exhibit.so/exhibits/zrHKbV2wqdpcRyfVW05M
Developing a 3D story in Exhibit
We will learn how to use the tutorial Exhibit tool to give access to a 3D model.
Please register to use the tool.
Using the 3D model which you previously created, the task is to create a story which brings all of this together. You can upload files for images and 3D models directly in the Exhibit tool.
More instructions on creating an Exhibit are here: https://exhibit-culturedigitalskills.vercel.app/docs.
Content from Publishing with Sketchfab
Last updated on 2024-12-31 | Edit this page
Estimated time: 45 minutes
Sketchfab is a popular tool for sharing and embedding 3D models.
It offers the 3D model creator the ability to:
- Upload 3D files;
- Manage navigation and views;
- Edit the model’s orientation and lighting;
- Add annotations to the model;
- Add simple metadata;
- Publish the model online.
Upload 3D files
To upload a 3D file, you need to first create an account. This will allow to upload a 3D model. Login to your account, and click on the upload button.
Please note that Sketchfab allows to upload a file up to 100MB. Hence, you need to ensure the resolution is lowered in your file.
The software will allow to open your files. Sketchfab supports formats, including FBX, OBJ, DAE, BLEND, STL and you can also upload an archive like ZIP, RAR, or 7z, containing your textures, materials, and mesh.
If using textures which are available in separate files, it is recommended to zip your files together to simplify the upload process.
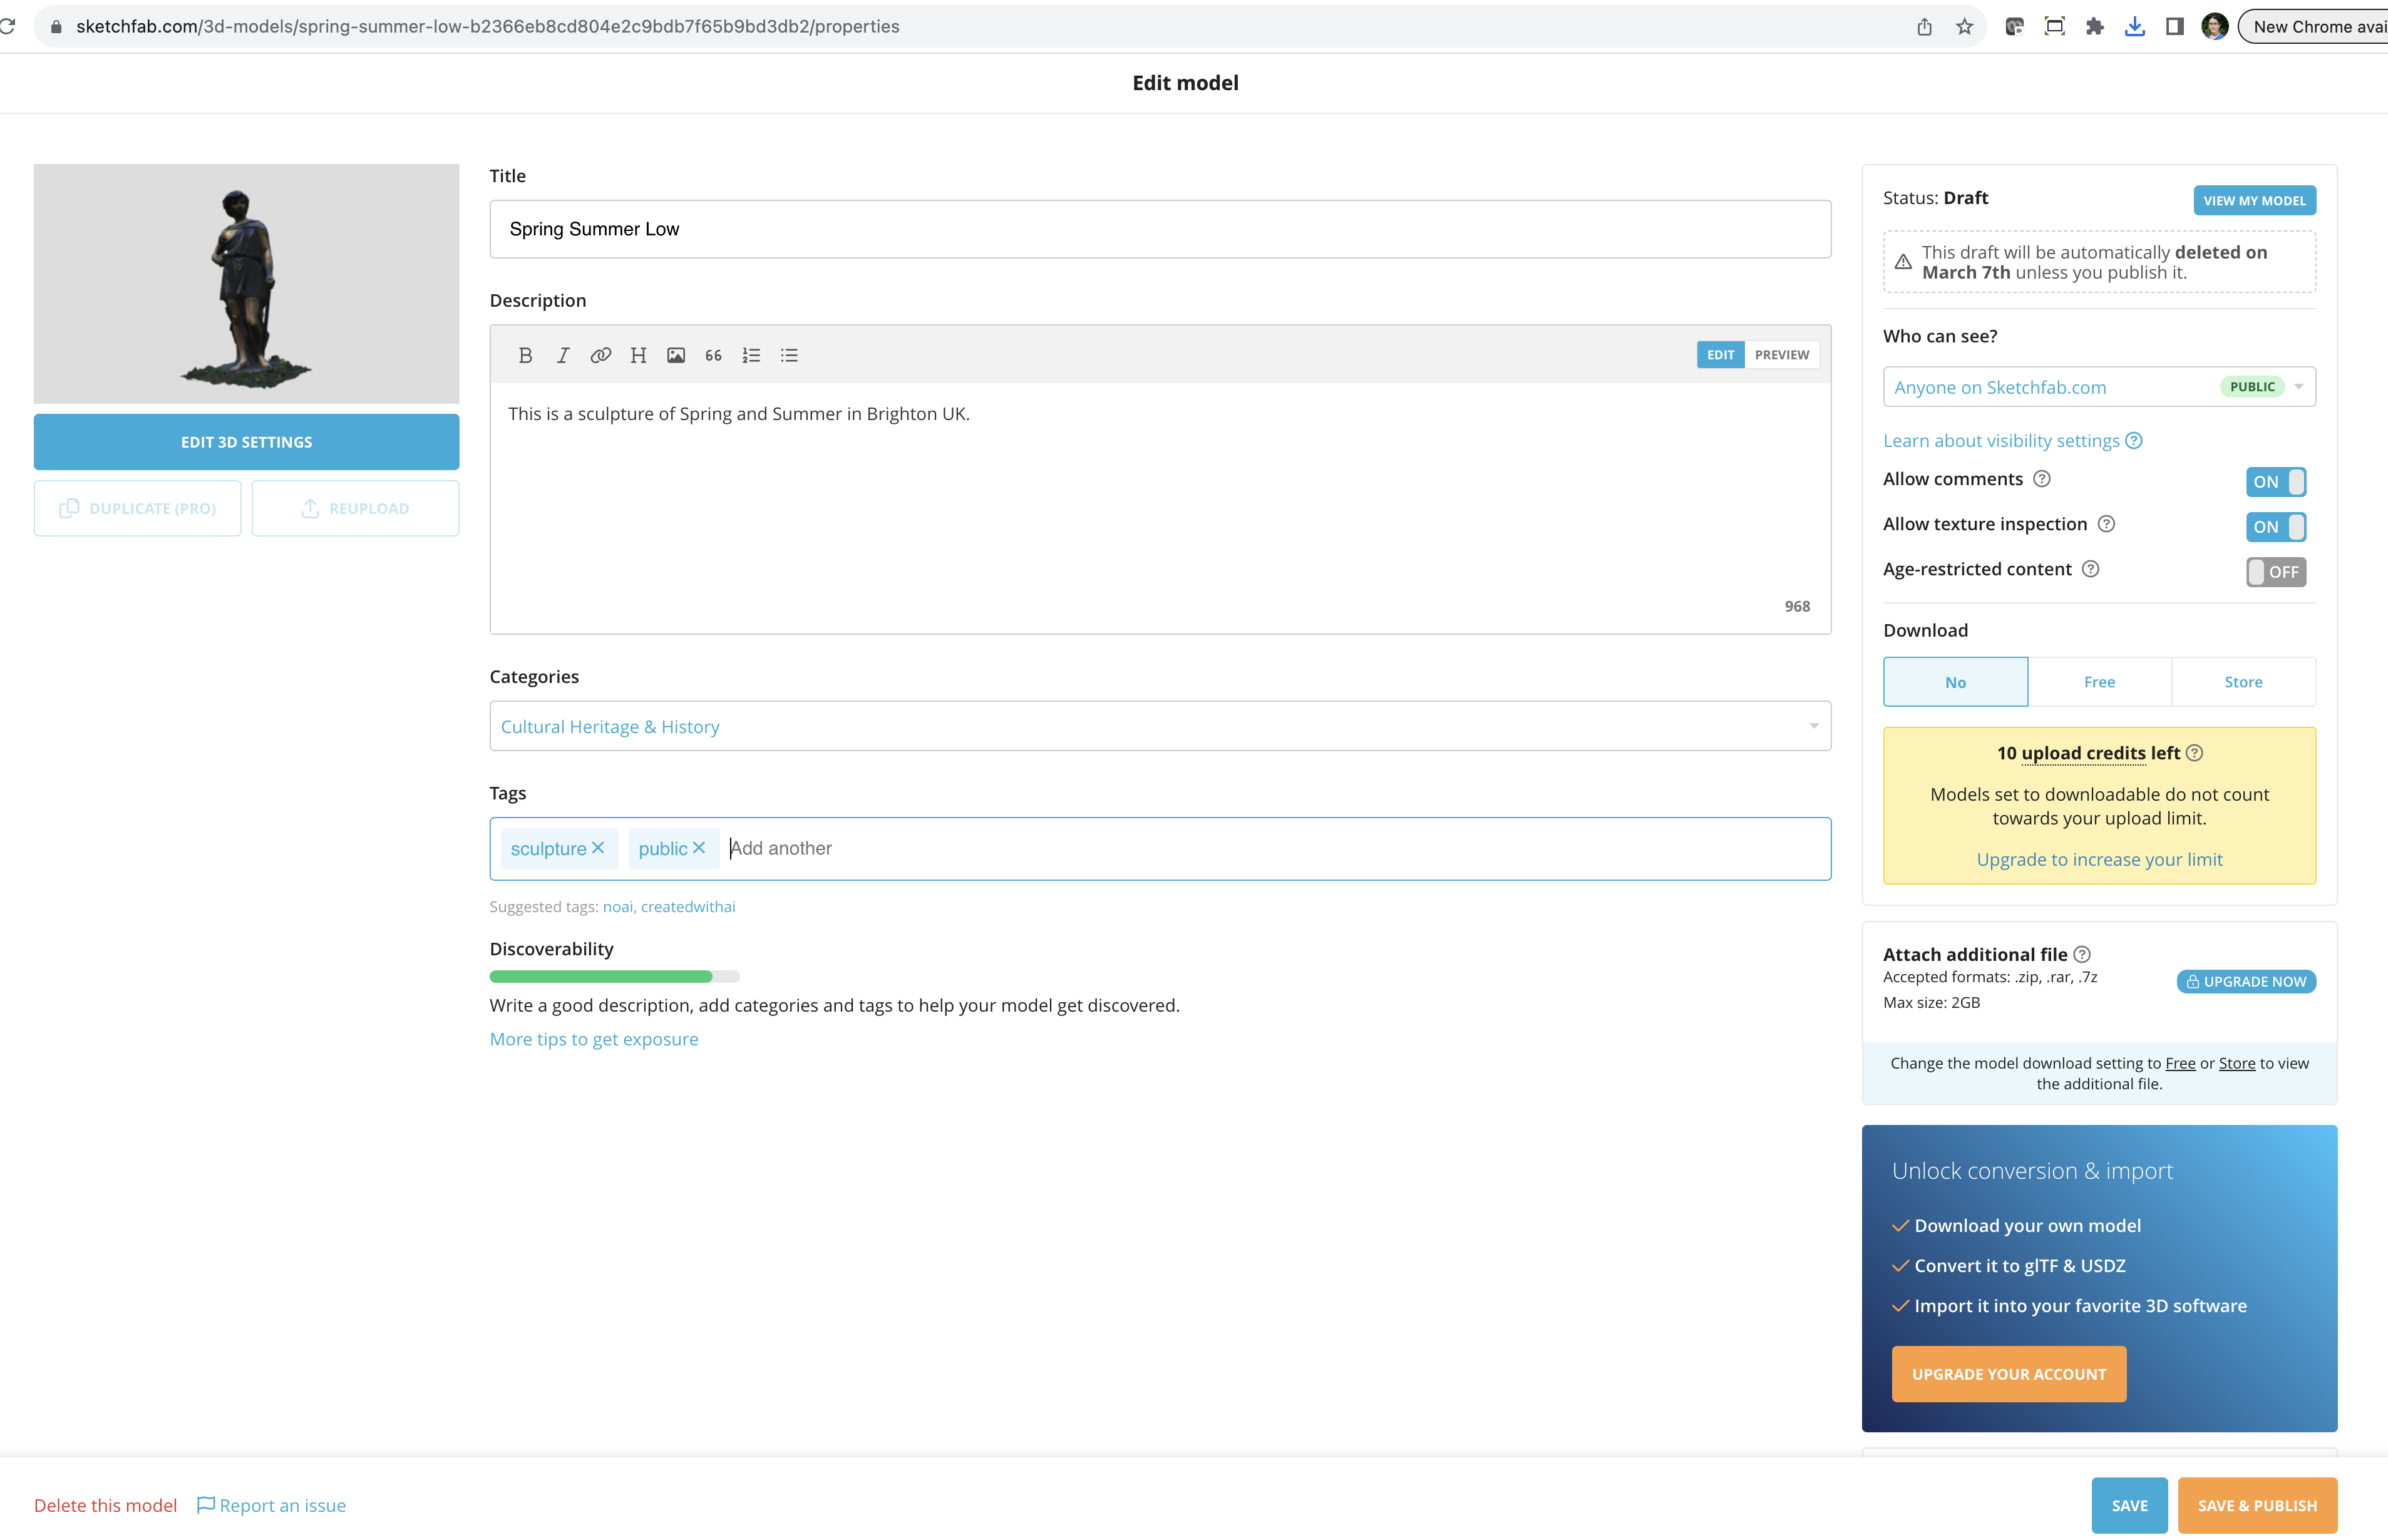
Sketchfab allows you to input basic metadata, including:
- Title
- Description
- Categories, which is best to use “Cultural Heritage and History”
- Tags
- Who can see the 3D model giving options such as public, private or password protected
- Whether to allow comments on this model
- Whether to allow texture inspection
- Whether it is age-restricted
- Whether people can download the 3D model
Note that Sketchfab has an upload limit for 3D models that cannot be downloaded.
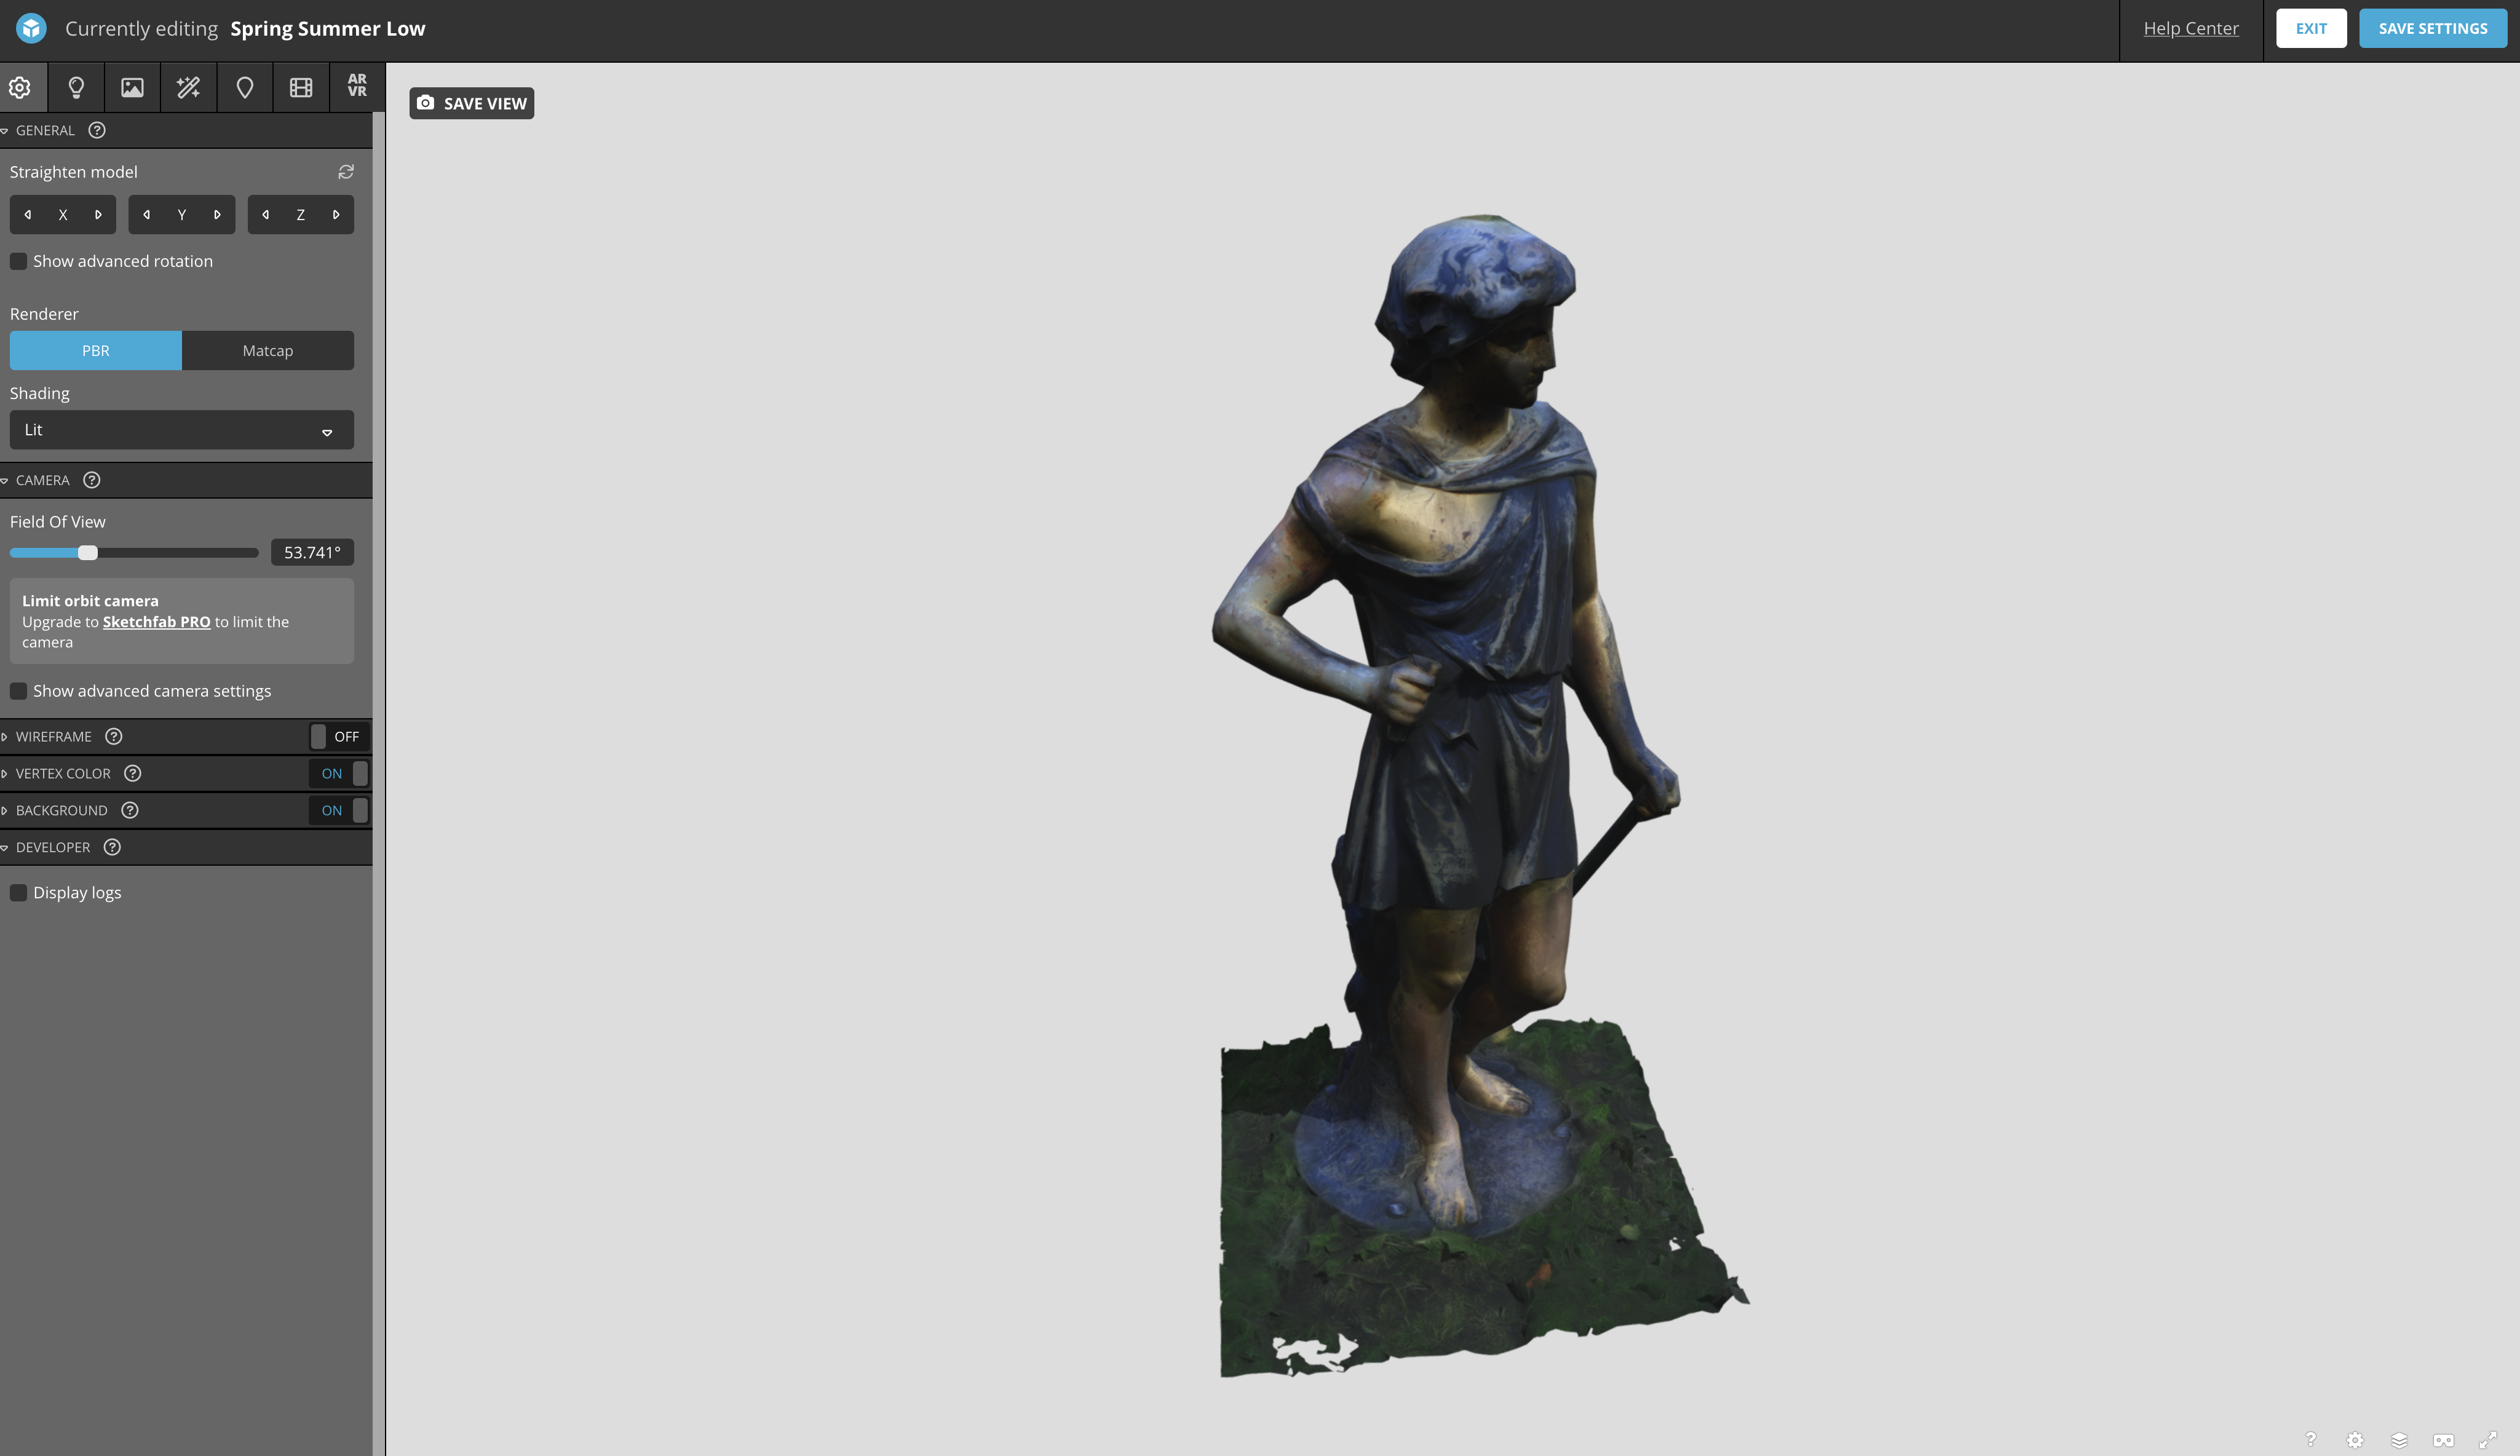
To edit the settings of the 3D model, click on Edit 3D Settings. This interface allows you to edit settings including:
- Scene settings, such as the 3D model position, its shading, and the camera field of view.
- Lighting settings.
- Material settings.
- Apply post-processing filters.
- Annotations and animations
- Scale the 3D model (specially useful for VR/XR viewing).
Challenge
Open an account on Sketchfab if you do not already have one, and upload your 3D model.
Add metadata and adjust the various settings for viewing your 3D model.
Annotations
Annotations support navigating the 3D models and looking at interesting details.
To add annotations to your 3D model, select annotations on the edit settings menu. For each annotation:
- Orbit around the 3D model using the mouse until you find the position you want to annotate. You can zoom into the model if needed.
- Double click in the 3D model.
- This will create a pinned number on your 3D model, and a window will appear for you to input a title and description. The description can be input in text format. But the annotations support a wider range of data types if you are skilled in using Markdown.
Click on Save Settings. Your annotations will be saved.
Spring Summer Low by culturedigitalskills on Sketchfab
Challenge
Create a few annotations on the 3D model you have uploaded highlighting important aspects.